Postman
This page contains instructions on use Postman to interact with Amica APIs.
What is Postman?
Quoting the Postman website:
Postman is an API platform for building and using APIs. Postman simplifies each step of the API lifecycle and streamlines collaboration so you can create better APIs—faster.
Postman is a prevalent client used by over 25 million developers worldwide. It is available for Windows, Mac, and Linux.
Using Postman with Amica APIs
We leverage our Open API Specification to build Postman collections automatically that you can import and use with your local Postman installation.
Prerequisistes
Install Postman
If you haven't already, please download and install Postman. There's also a web version available, but you'll first need to create an account to use it.
Once you start Postman, it will likely ask you to create an account (at the time of this writing, you can skip this step, but that'll probably change in the future.) A free account will suit your needs.
Download and import the Amica Postman Collections
Once Postman is ready on your machine, download the following collections:
Then, import the two collections in Postman following these instructions. Once that's done you're ready to interact with the Amica APIs.
Authentication
Before performin most requests, you'll need to authenticate yourself to obtain an authentication token. Once you get your bearer token you can use it for multiple requests, until it expires.
Authentication requests must include both the X-Amica20-ApplicationId and the
X-Amica20-ApiKey headers. Open the Amica Admin API collection, then click on
the "Authenticate an user" node. Click on Postman's Headers tab and add the
headers and their values.
Info
If you don't have an API key yet, make sure you get one. Also, to make sure you read the Authentication and Required headers pages first, to get a grasp of how the whole Auth/request/response cycle works.
Once the headers are set, switch to Postman's Body and fill it with a json
object containing username and password fields.
Hit the Send button and, if all stars align (eg. username and password are
correct and the match the API key header value), you'll get a 200 OK response.
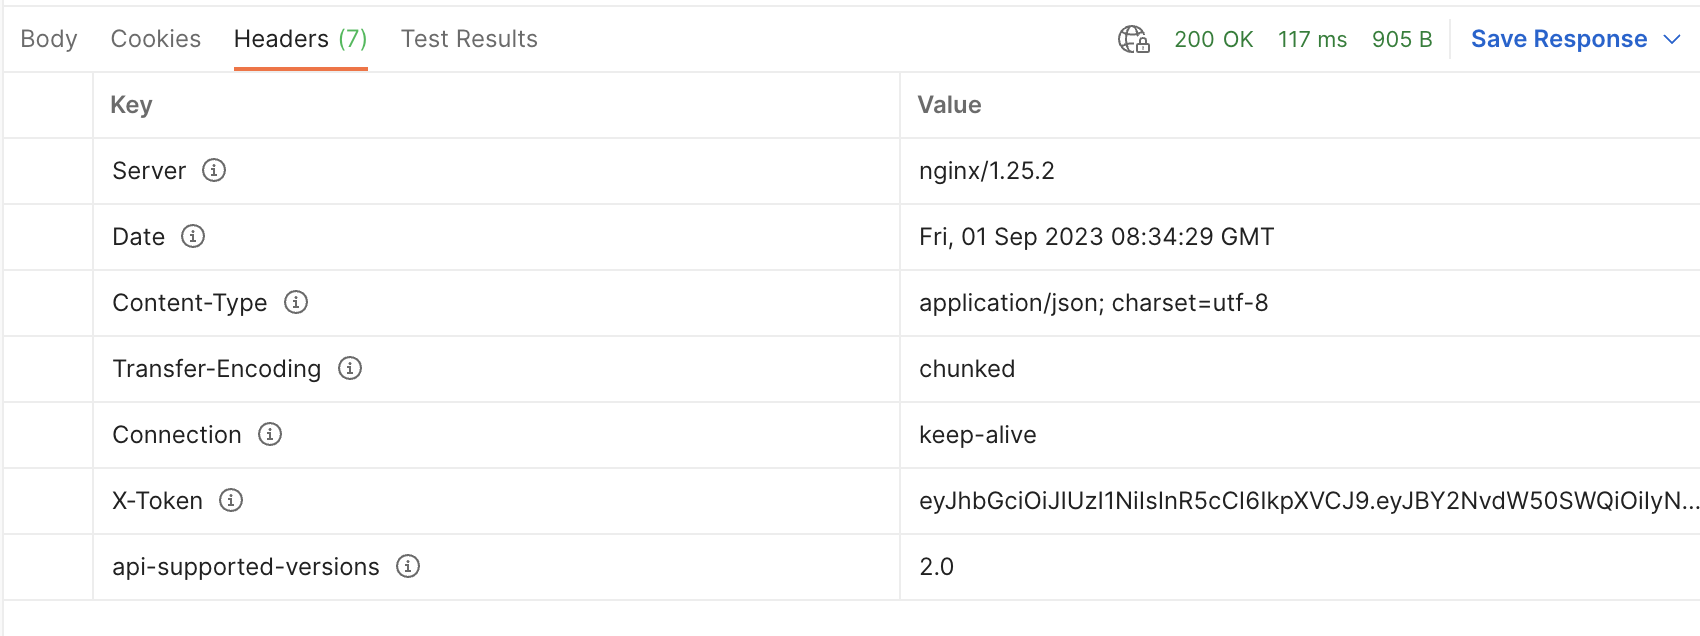
Click on the response Headers tab to retrienve the X-Token value.
Save that token value somewhere, as you'll need to use it in all your following API requests, by using it in the request Authentication tab, as a Bearer Token.
Performing a request with Postman
Request token and headers
All API requests and most Admin API requests are authenticated and require some mandatory headers.
Setting the authorization token
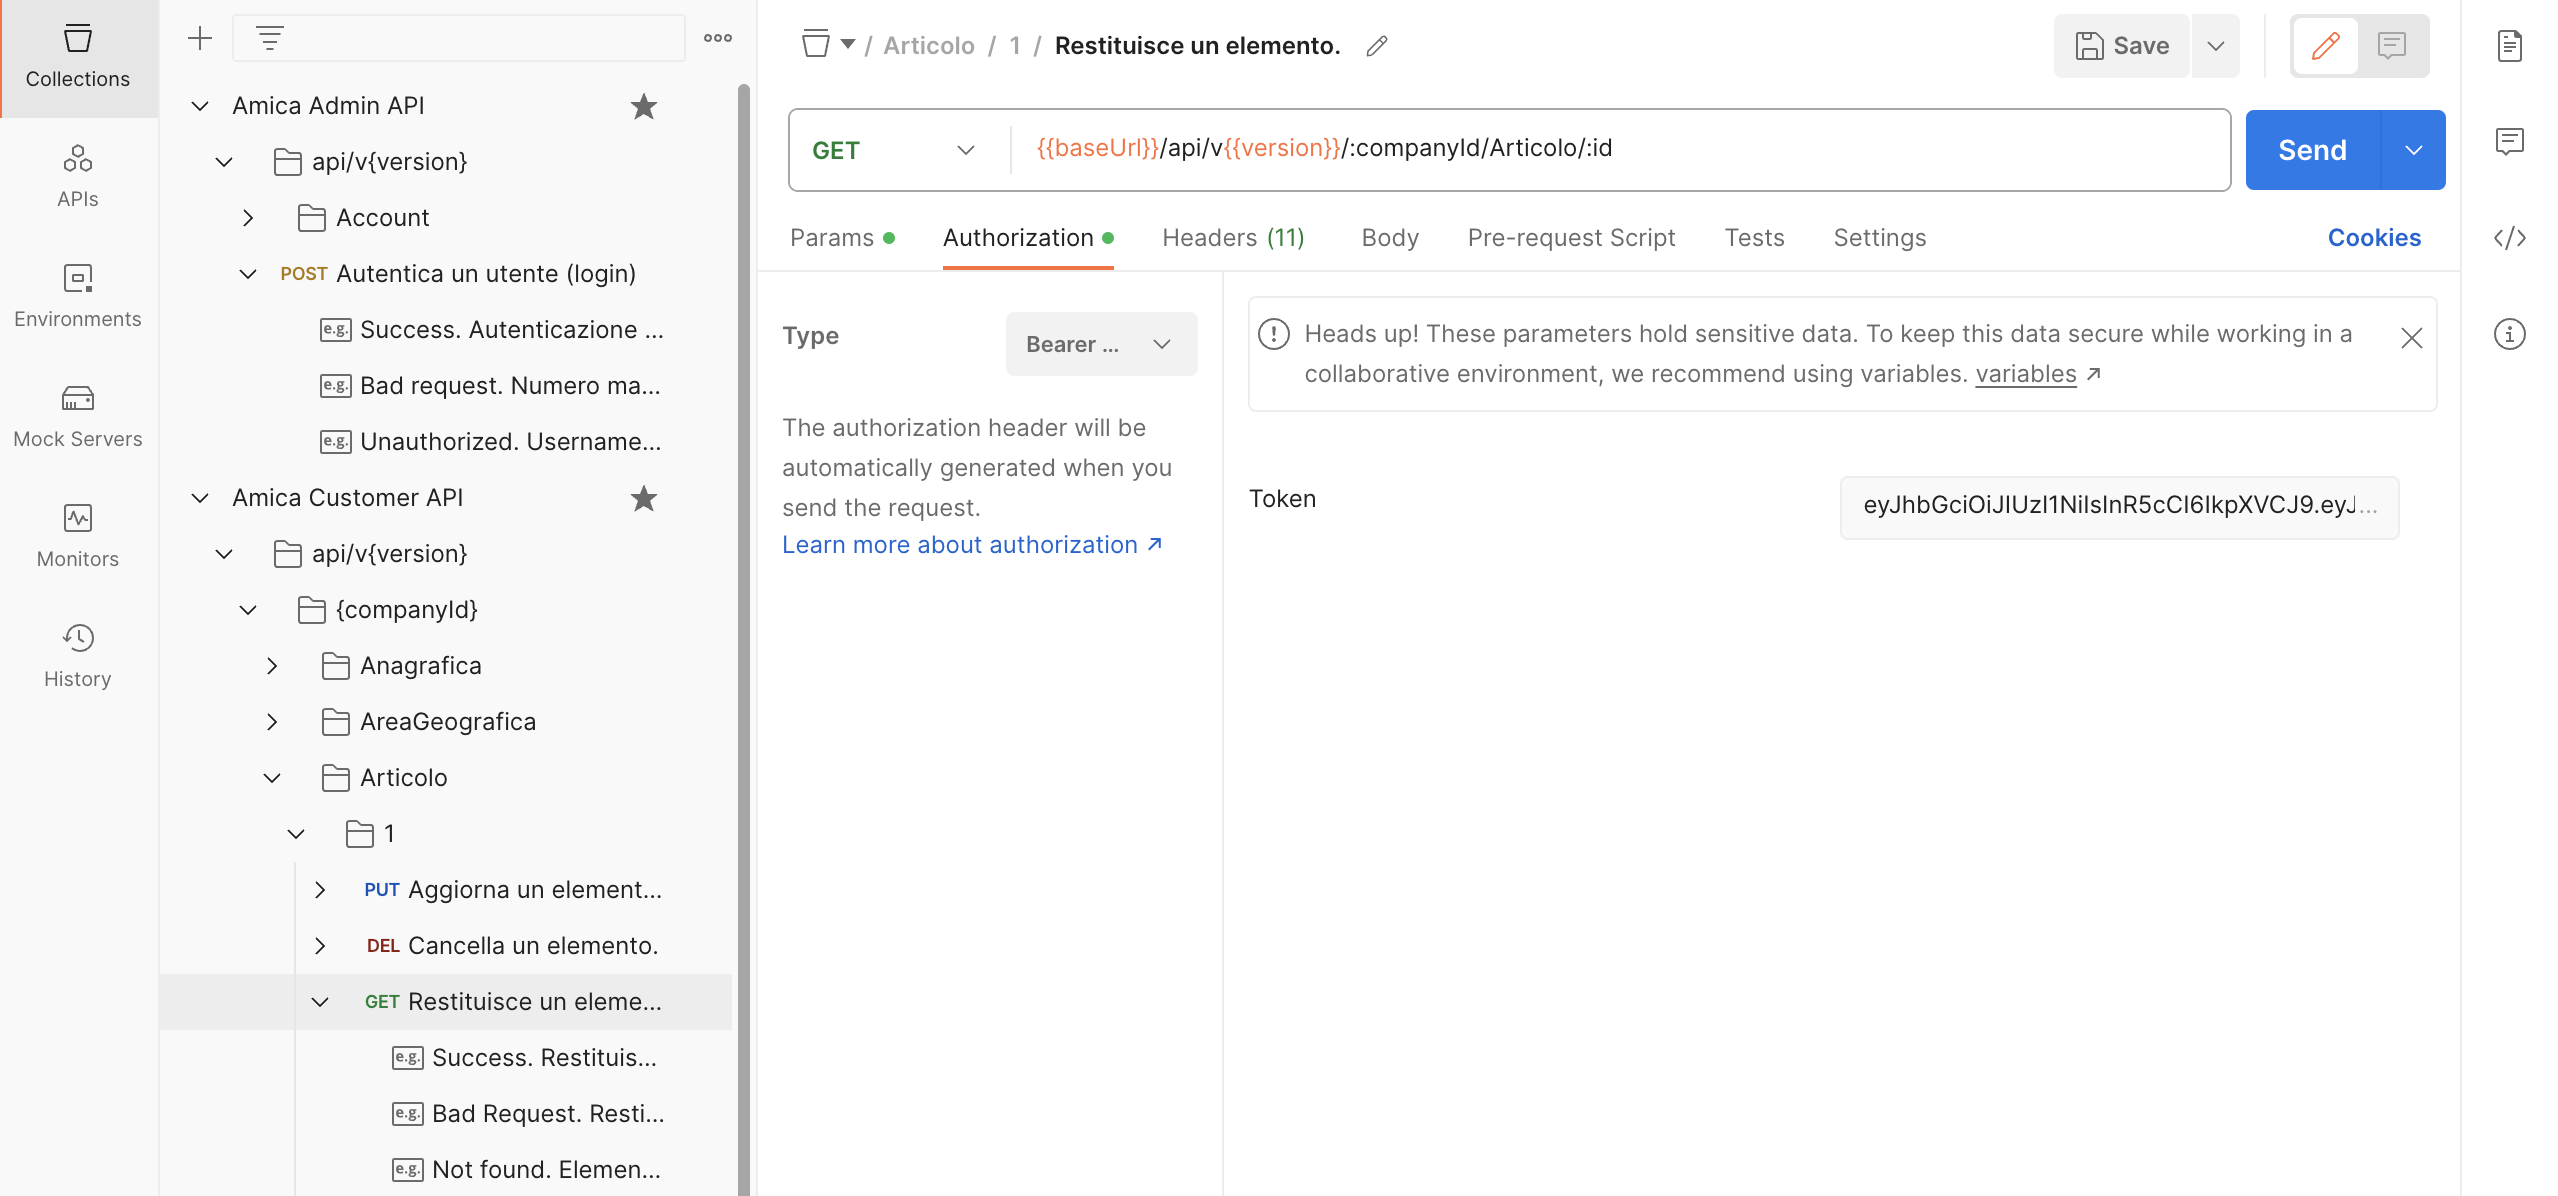
In the image below we're preparing to perform a GET request to the /articolo/
endpoint. First think we want to do is hit the request Authorization tab,
select Bearer Token as type, and then paste the token you obtained in the Authentication step above:
Setting the required headers
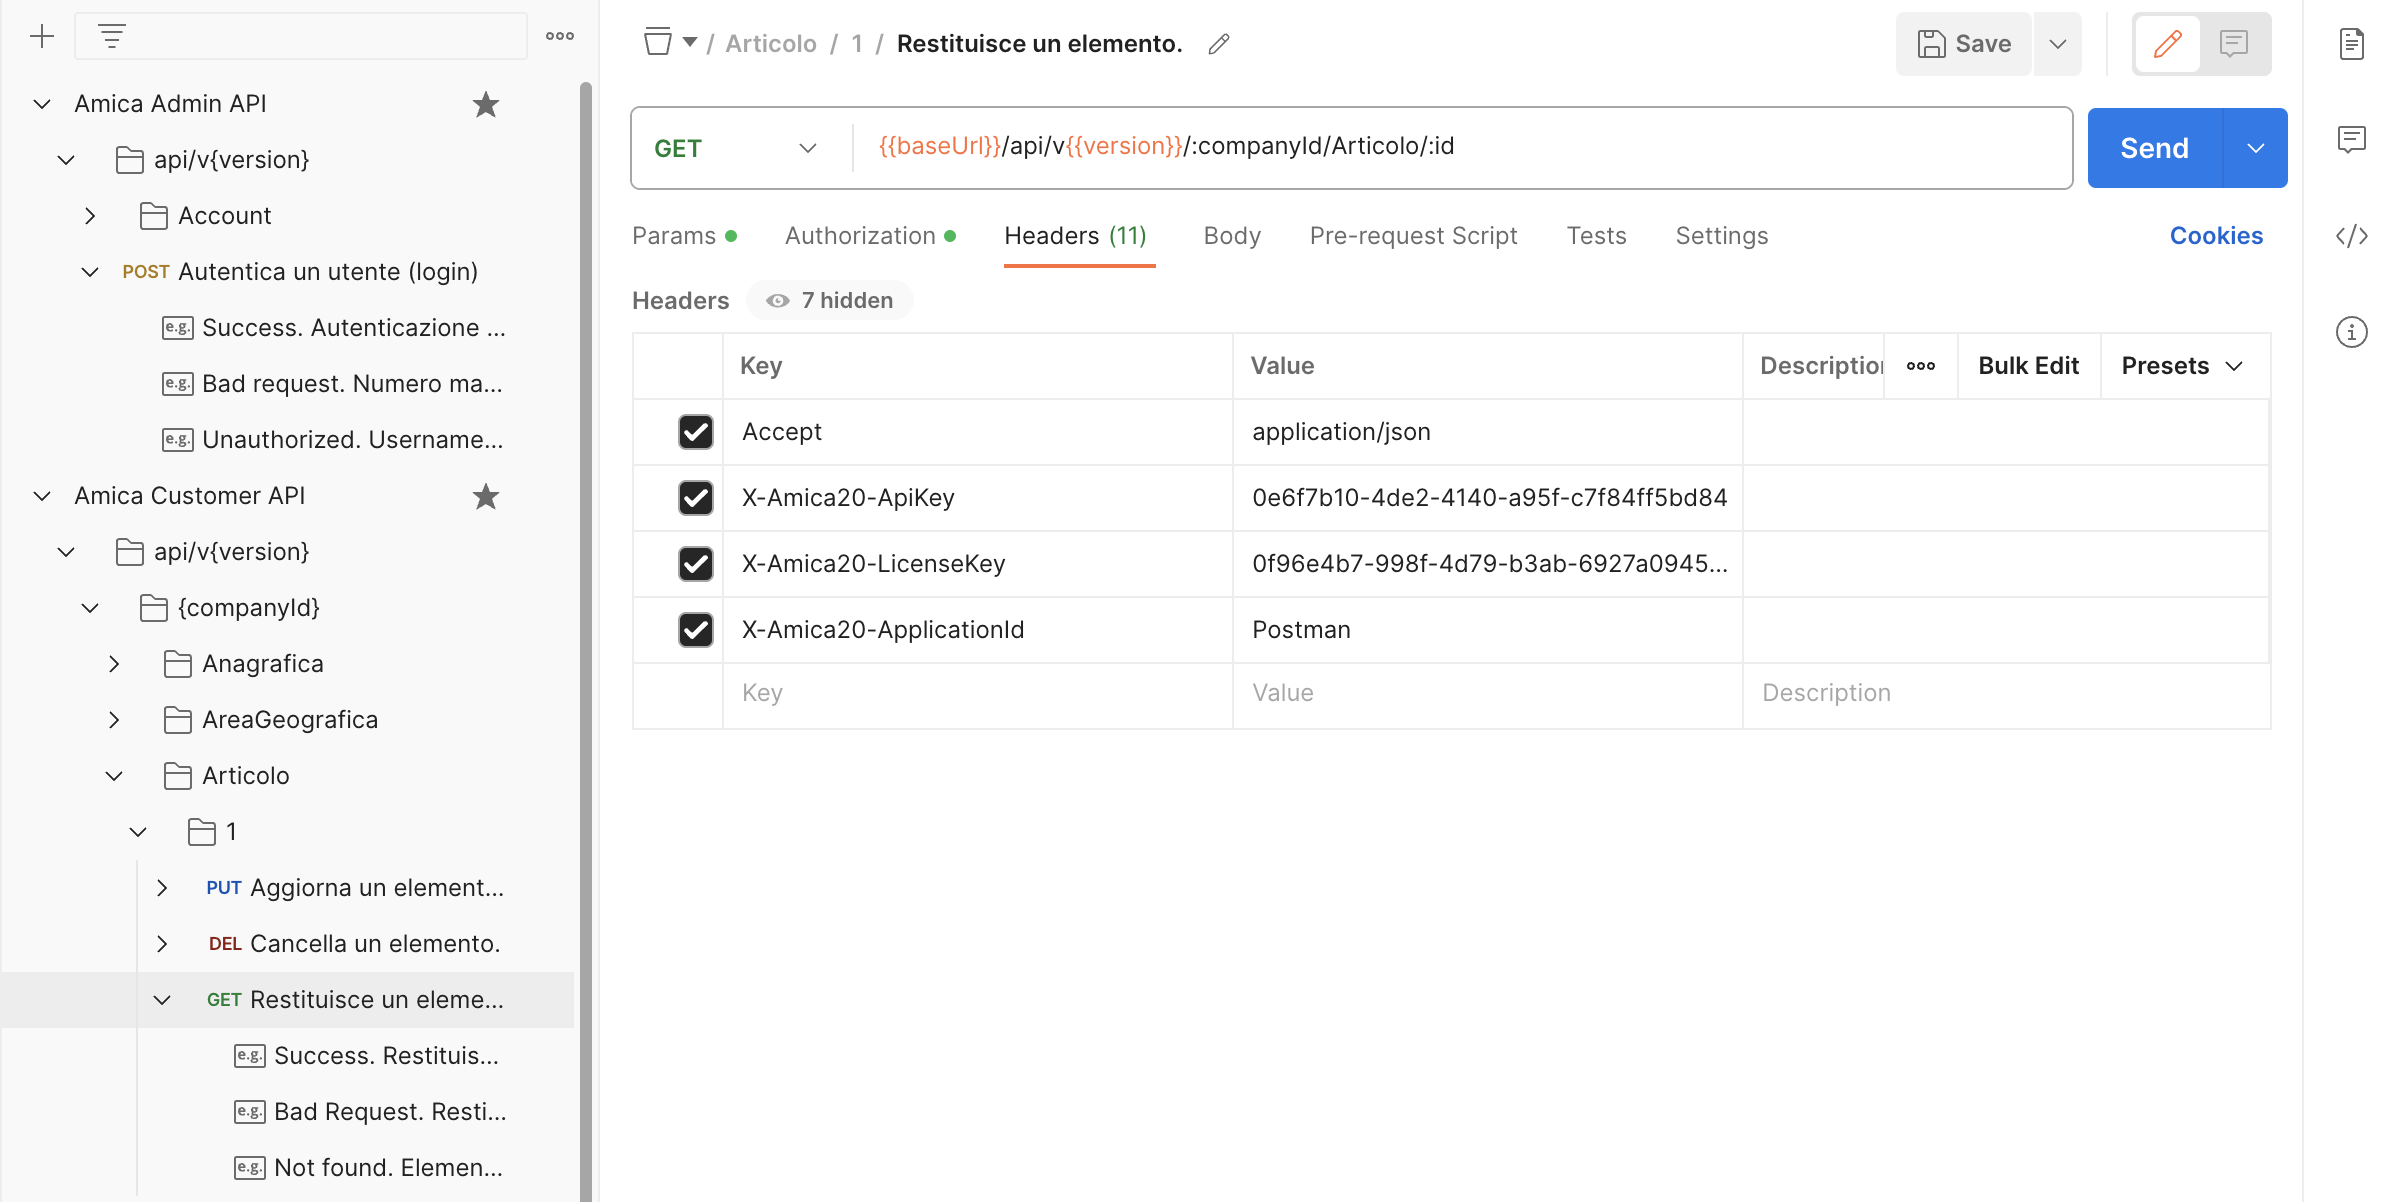
In the image below, the request Header tab has been
filled with all required headers. Make sure you fill these values appropriately
before submitting the request, or you'll get a 403 Forbidden error back.
Info
See the Authentication and Required headers pages for more info.
GET a stock item
Once Authorization and required headers are set, performing a request is straightforward.
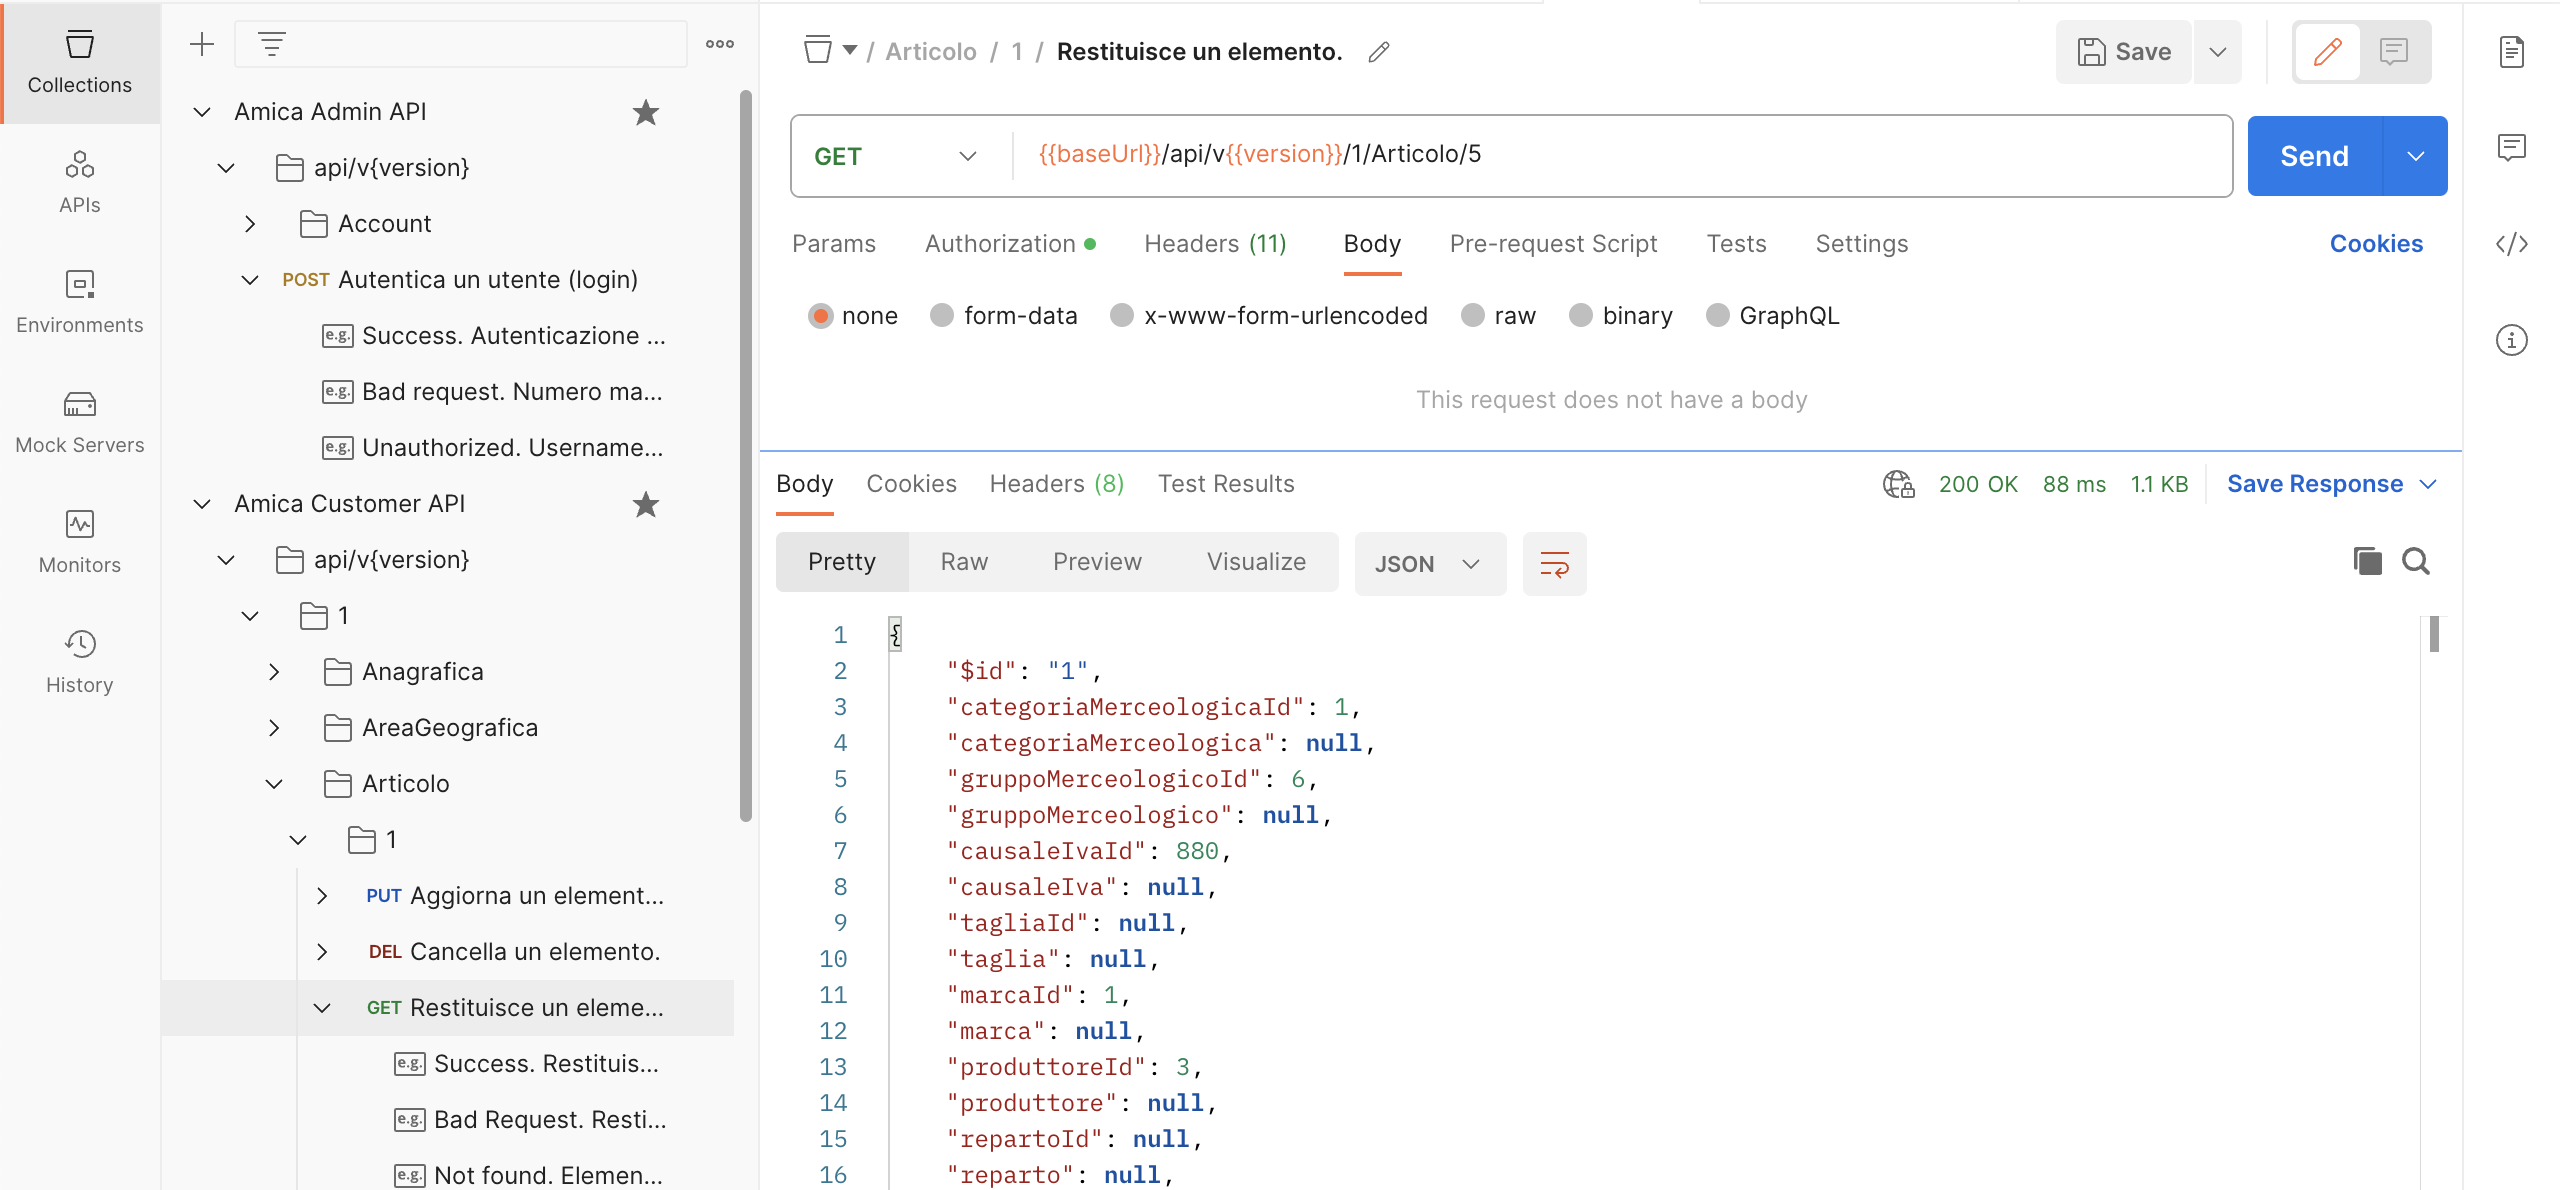
In the image below we navigated the Customer API collection
tree untill the GET Articolo node. Make sure you set the companyId (Azienda)
and id values appropriately in the URL.
The response payload contains the body of the requested object.
POST, PUT, DELETE
Performing POST (add), PUT (update), and DELETE requests is similar to GET requests. For write operations such as POST and PUT, you have to provide the object to be added or updated in the request body. Of course, make sure you change the request method as appropriate (if you use the API collection, the method will be selected for you.)


